延續前篇 PayPal 付款流程整合 前篇

Client 端整合

單純用 Client 整合的話只需要單純用 HTML 跟 JavaScript 就能完成,不需要寫到 Server 端的程式碼。

  • 建立 PayPal app 取得 credentials,傳入 client ID 。

  • payment function 使用 paypal.rest.payment.create() 設定付款選項。參考 : 如何建立帳單

  • onAuthorize call back 顯示成功頁面

以下程式碼說明如何在正式環境建立一個 $1.00 USD的帳單,當付款成功後,顯示成功頁面。

Sample
  • html
1
2
3
4
5
6
7
8
9
10
11
12
13
14
15
16
17
18
19
20
21
22
23
24
25
26
27
28
29
30
31
32
33
34
35
36
37
38
39
40
41
<div id="paypal-button"></div> 

<script src="https://www.paypalobjects.com/api/checkout.js"></script>

<script>
paypal.Button.render({

env: 'production', // Optional: specify 'sandbox' environment

client: {
sandbox: 'xxxxxxxxx',
production: 'xxxxxxxxx'
},

payment: function() {

var env = this.props.env;
var client = this.props.client;

return paypal.rest.payment.create(env, client, {
transactions: [
{
amount: { total: '1.00', currency: 'USD' }
}
]
});
},

commit: true, // Optional: show a 'Pay Now' button in the checkout flow

onAuthorize: function(data, actions) {

// Optional: display a confirmation page here

return actions.payment.execute().then(function() {
// Show a success page to the buyer
});
}

}, '#paypal-button');
</script>

範例來源 :
Basic client integration
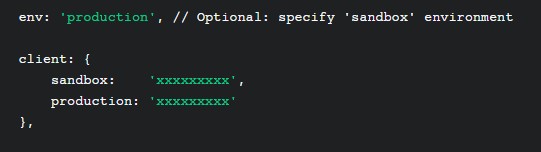
調整參數說明 :
說明 修改說明
沙盒整合測試 env: sandbox
立即執行付款 commit: true 會顯示 Pay Now 按鈕,沒設定會顯示 Continue 按鈕
付款之前顯示確認頁面 onAuthorize call back 可使用 actions.payment.get() 取得帳單和付款人資訊

必須顯示付款確認頁面,否則 actions.payment.execute()actions.payment.get() 會無法使用。

Server 端整合

Server 端整合有更多的彈性,更多的控制權來完成付款流程。

設置 Client 環境

  1. 載入 checkout.js
  2. 設定 payment function 建立帳單
    • 呼叫 Server 建立帳單
    • 從建立帳單的 API 取得 paymentID,呼叫resolve(data.paymentID,開始付款人授權流程。
  3. 設定 onAuthorize 完成付款
    • 之後的 REST Payments API 呼叫,都需要用到 data.paymentIDdata.payerID
    • 可選擇是否顯示帳單明細
    • 呼叫 Server 端 執行付款
Sample
  • html
1
2
3
4
5
6
7
8
9
10
11
12
13
14
15
16
17
18
19
20
21
22
23
24
25
26
27
28
29
30
31
32
33
<div id="paypal-button"></div>

<script src="https://www.paypalobjects.com/api/checkout.js"></script>

<script>
paypal.Button.render({

env: 'production', // Optional: specify 'sandbox' environment

payment: function(resolve, reject) {

var CREATE_PAYMENT_URL = 'https://my-store.com/paypal/create-payment';

paypal.request.post(CREATE_PAYMENT_URL)
.then(function(data) { resolve(data.paymentID); })
.catch(function(err) { reject(err); });
},

onAuthorize: function(data) {

// Note: you can display a confirmation page before executing

var EXECUTE_PAYMENT_URL = 'https://my-store.com/paypal/execute-payment';

paypal.request.post(EXECUTE_PAYMENT_URL,
{ paymentID: data.paymentID, payerID: data.payerID })

.then(function(data) { /* Go to a success page */ })
.catch(function(err) { /* Go to an error page */ });
}

}, '#paypal-button');
</script>

範例來源 :
Advanced server integration

Server 如何整合付款流程說明

  1. Client 端的 payment method 呼叫 Server
  2. Server 呼叫 Payments API 建立帳單

    記得呼叫 create-payment API 時,傳入 redirect_urls,當付款完成後,可以在 onAuthorize function 取得 redirect_urls

  3. 繼步驟2,會取得 JSON 回應
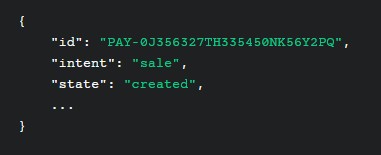
  4. Server 送出回應到 Client 藉以取得 paymentID
  5. 開始初始化付款流程, 在 client 建立的 payment method 從回傳的 JSON 訊息傳 paymentIDcheckout.js script
  6. 開啟 lightbox 讓付款人同意付款

執行付款

使用者同意付款後, checkout.js 會呼叫 onAuthorize call back。

執行付款之前,建議可以顯示付款明細

  1. onAuthorize call back 呼叫 Server 並傳入 data.paymentIDdata.payerID,執行付款
  2. Server 呼叫付款完成 API 完成付款

Server 呼叫 API 步驟

測試整合流程

要做 end-to-end 測試,須先建立 merchant(Business) 和 buyer(Personal) 帳號,才可以做沙盒環境測試。 建立帳號說明

小結

目前只把 PayPal 付款流程大致了解,有這些概念後,再去參考 API 文件應該會容易許多。

參考

PayPal 和 Braintree Demo (包含程式碼)